Basics of Post Processing in Lightroom
This article explains the editing workflow in Adobe Lightroom Classic. Adobe Lightroom and its Mobile version offer almost all of the same features but with a slightly different interface. Lightroom’s Develop panel is mostly the same as Adobe Camera Raw that can be accessed from Photoshop, so all the editing concepts will also be useful for users of Adobe Camera Raw (ACR) or Adobe Lightroom.
Table of Contents
- Creating a Lightroom Catalog
- How to import files into Lightroom
- The Develop Panel
- Working with color in Lightroom and Adobe Camera Raw
- Exporting an image in Lightroom
Lightroom is one of the most widely used raw processors and image editors out there. It can be used from basic to advanced edits and it is loved by many beginners and pro users. It’s also likely to be the first photo editor that most people experience.
Lightroom is great for cataloging photos. I, for instance, keep a catalog that spans several years back to when I started with photography. Each year is organized by months and each month by either day or trip.
There are different ways of organizing photos in Lightroom and it’s up to the user to choose one. Once chosen, it’s a good idea to stick to it to keep the catalog consistent.
Of course once the photos are organized, Lightoom lets you search and filter the photos within the catalog. This can be very useful once the number of photos grows.
Apart from all the organizational features Lightroom is a raw photo editor and it is a non destructive, non linear one, meaning that all the edits can be changed and reverted separately regardless of the order they were applied to the original file.
Creating a Lightroom Catalog
The first thing to do in Lightroom is to create a new catalog. This is something you’ll have to do once, and afterwards just keep using the same catalog. Creating a new catalog is as easy as:
File -> New Catalog
Enter a new name, and done! Lightroom will restart and open the newly created catalog.
How to import files into Lightroom
Importing raw photos into Lightroom is the next step. My workflow usually consists in copying the raw files from the camera’s SD card into a folder on an external drive where all the original files are. This is done outside of Lightroom. After that, in Lightroom I go to File -> Import Photos and Videos. This opens a new window:
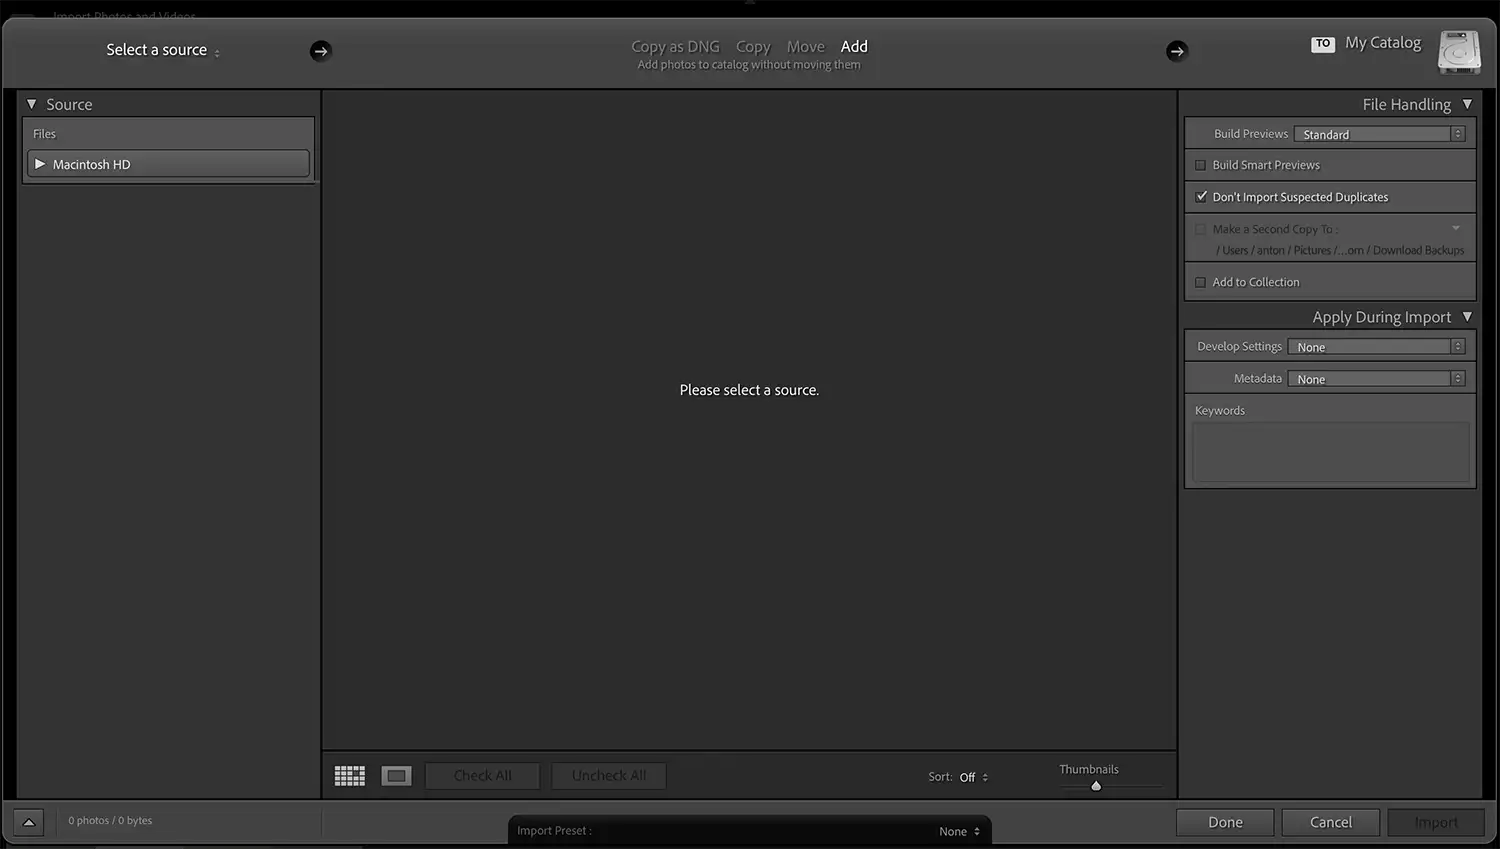
First in Source (left side panel) navigate and select the folder where the raw files are. The middle section will display previews of the raw files. I usually just choose Add. This option keeps the files in the same place physically and only adds them to the Lightroom Catalog.
The right side of the window has a number of options of things Lightroom can do during and after the import:
- Build previews: Standard is the default and the option I choose. Other options will be a trade off between speed at which Lightroom displays the raw images and the storage it uses (better previews will be faster to render but also take up more space)
- Build smart previews: usually off. Smart previews allow you to work with files offline. You can build smart previews for separate photos after they are imported and if the original file is unavailable (external drive is detached) you can still edit the image and synchronize the edits when the storage is back online.
- Don’t Import Suspected Duplicates: as the name says, Lightroom will avoid importing files that already exist in the catalog.
- Add to Collection: will automatically add the new files to a collection. Collections is another way of organizing photos in Lightroom and can be very useful. Think of them as labels or tags.
- Apply During Import - this section allows setting up some automated edits to all the files that are being imported. It’s also a place where you can add some metadata and keywords. The keywords are great for searching photos later.
By clicking on Import the process starts. It will take from a few seconds to a couple of minutes depending on the number of photos and once it finishes you are ready to start with the edits.
The Develop Panel
How to apply global edits
Lightroom’s main view is divided into separate tabs or panels. The first one is Library. This is a great way to go through the photos and quickly preview them. But in order to work on a photo you’ll need to go to the Develop panel.
First find and select the photos(s) you want to process and click on Develop panel.
On the right you will see all the tools that can be used for editing grouped in panels. The first one is the Basic panel.
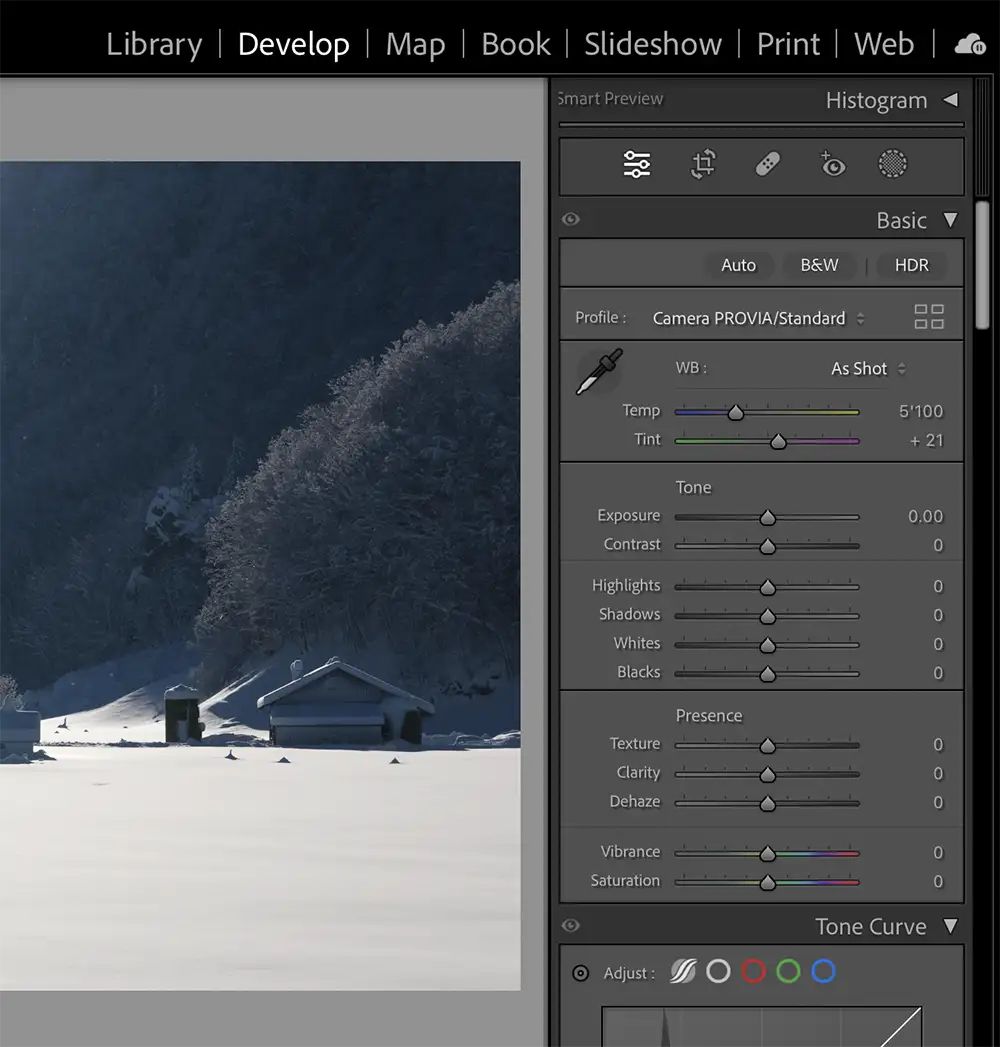
The Basic panel is usually the first approach. The changes here will affect the image globally (as opposed to local adjustments that can be done with masks). It is however a good starting point for any image:
- White balance: allows setting the temperature and tint.
- Tone: The exposure is probably the most used slider. It’s a good idea to balance the lights and shadows of an image to start with. By using the exposure, and then Highlights, White and Shadows and Blacks I usually try to achieve a balanced exposure.
- Presence: Texture, Clarity and Dehaze is something I usually don’t change globally, these are better set locally using masks.
- Vibrance and Saturation: depending on the image a bit of Vibrance can work. Some images will need Saturation decreased. Experiment with different values and see what you like.
Using local adjustments
Not all parts of the image require the same adjustments. By selectively applying edits it’s possible to emphasize certain parts and bring attention to what is important. Local adjustments are the key to a successful edit:
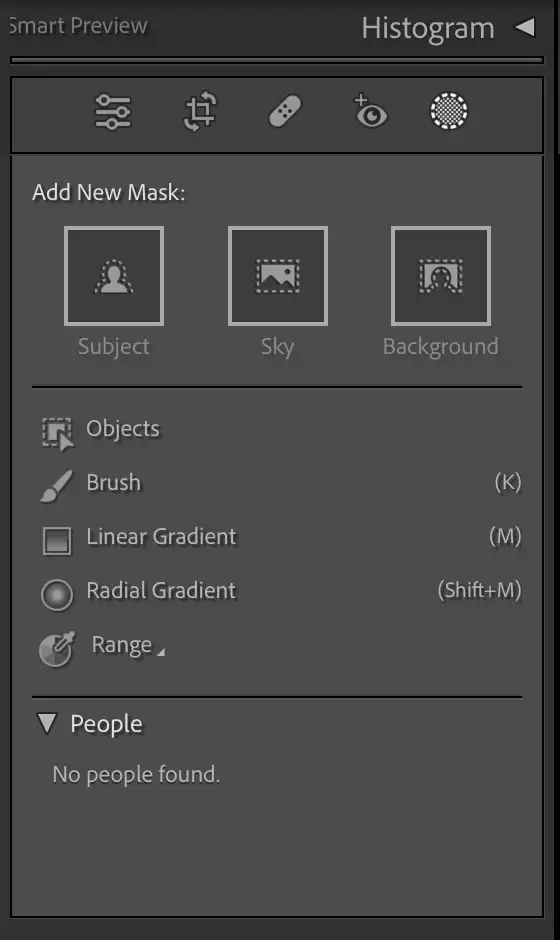
The latest versions of Lightroom offer great masking tools, some are color or luminance based, some are simple radial or gradient masks and we even have AI powered options, I’ll try to explain them here:
- Linear gradient - similar to a graduated ND filter, the adjustments go from 100% at the start to 0% at the end.
- Radial gradient - as the name suggests it’s a circular or an oval shaped mask, the adjustments can go from 100% in the center or when inverted 0% in the center.
- Brush - one of the most useful masks. This lets you free hand paint any adjustments with a mouse, a stylus or a touchpad.
- Select by color - selects area of the image by color. Useful for adjusting certain colors without affecting the rest of the image.
- Select by luminance - selection by how bright or dark the areas are.
- Select subject - AI based selection. Tries to mask out a subject of the photo. It works really well for some images but can have issues. It’s worth trying it anyway because it can save a lot of time.
- Select sky - no explanation needed. This works well in a lot of cases but you need to be aware of edges. Some refinement might be needed.
- There are other masks like select people (and body parts), background, etc. Experiment with them all. They are not perfect but can be useful.
Working with color in Lightroom and Adobe Camera Raw
Lightroom also allows us to work with color. It’s possible to color grade by introducing a certain hue into the highlights or shadows to adjust separate colors.
Color Mixer
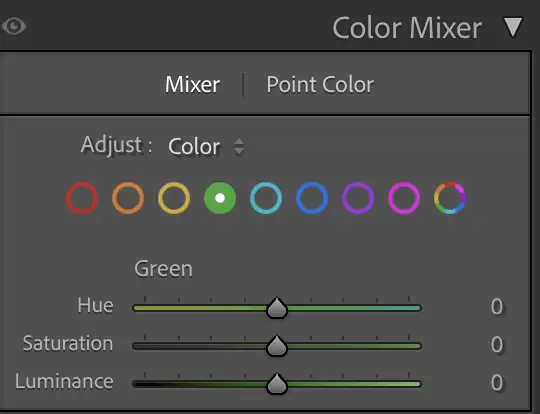
The color mixer tool displays a number of colors that can be adjusted individually. By selecting a color we can adjust its Hue, Saturation and Luminance. This can be useful if we want to achieve a certain style or just to fix some colors that might be over-saturated in the image.
Color Grading
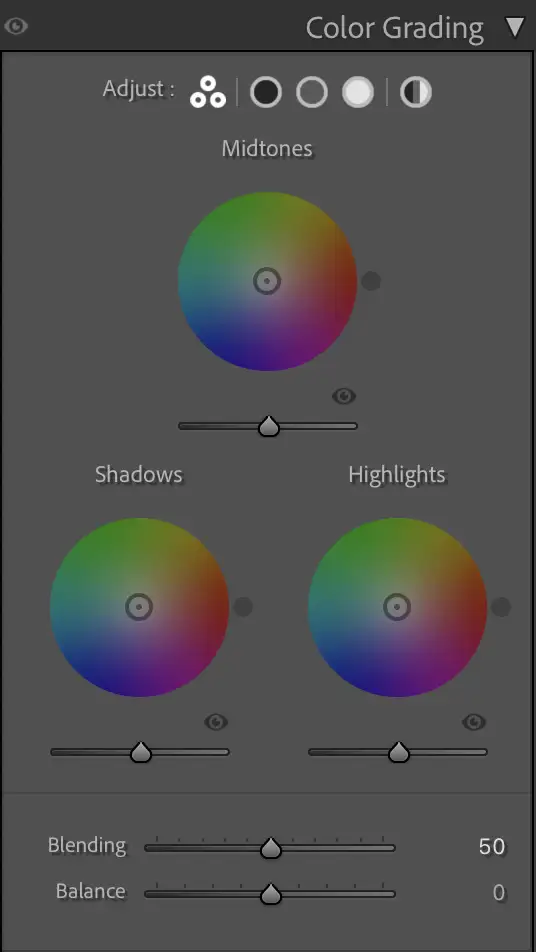
Color grading is a way to assign colors to bright or dark parts of the image. It can be used to create color separation, color contrast or just achieve a certain “look” in the photo. With color grading you can introduce a certain hue into highlights, shadows or midtones. A popular color grading technique is orange and teal, where the highlights get a bit of an orange tint and shadows teal or blue. This however, will depend on the image, and the effect that you are trying to achieve.
There are other panels in Lightroom but the ones mentioned above are the most important and the ones that you will need most of the time.Exporting an image in Lightroom
Once you are happy with the edit, the last step is to export the image and produce a jpg file that can be shared online. Exporting is as easy as right clicking the image and selecting Export -> Export...
This will open a new dialog with a few options.
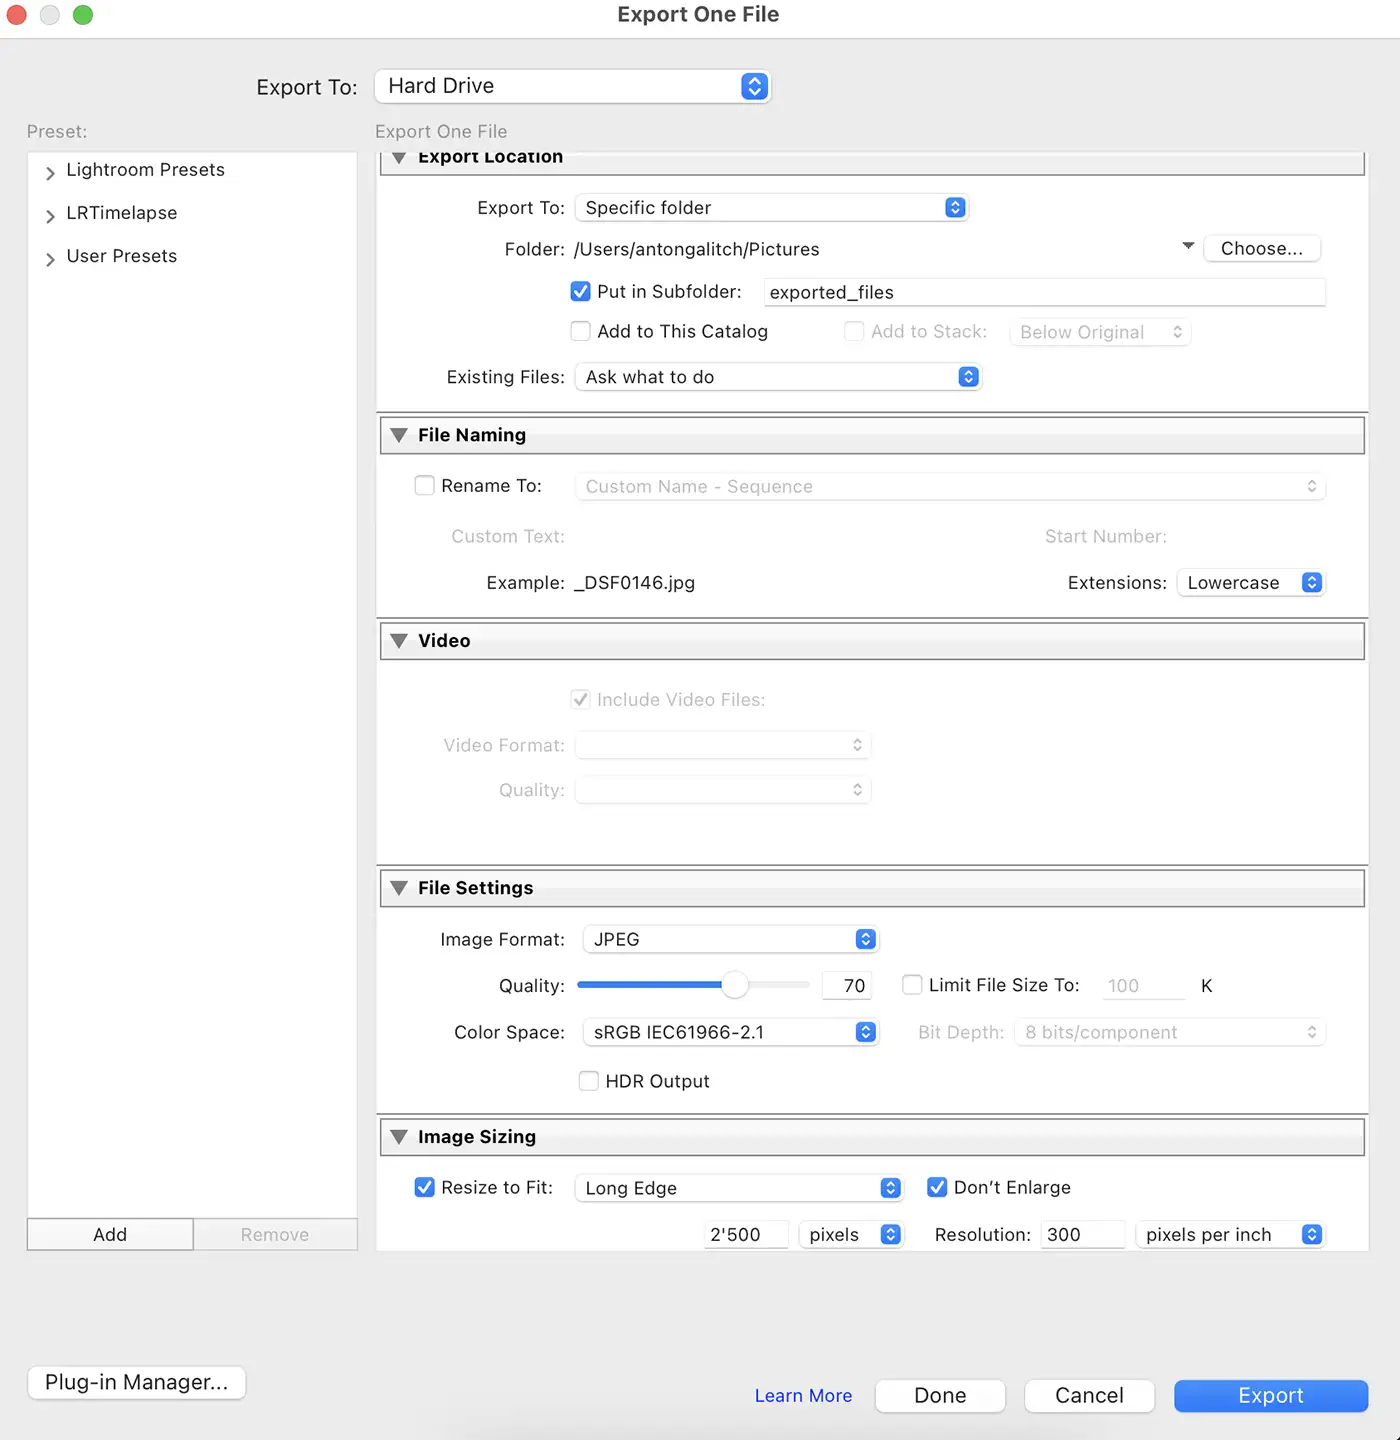
The main sections are:
- Export location: where the exported file will be stored.
- File name: I usually leave it as it is
- File settings:
- Image format: JPEG
- Quality: 70 (anything from 60 to 90 would work). The higher the quality the larger the file size will be.
- Image sizing:
- Based on what the image will be used for. Instagram will take images no larger than 1440px for example.
- It’s important to set Don’t Enlarge to avoid upscaling the image.
- Sharpen For: usually screen unless the photo is being prepared for print.
Done, by clicking Export you will have the finished image in JPG format that can now be shared and viewed on any computer or mobile device.
Go back to Post Processing